
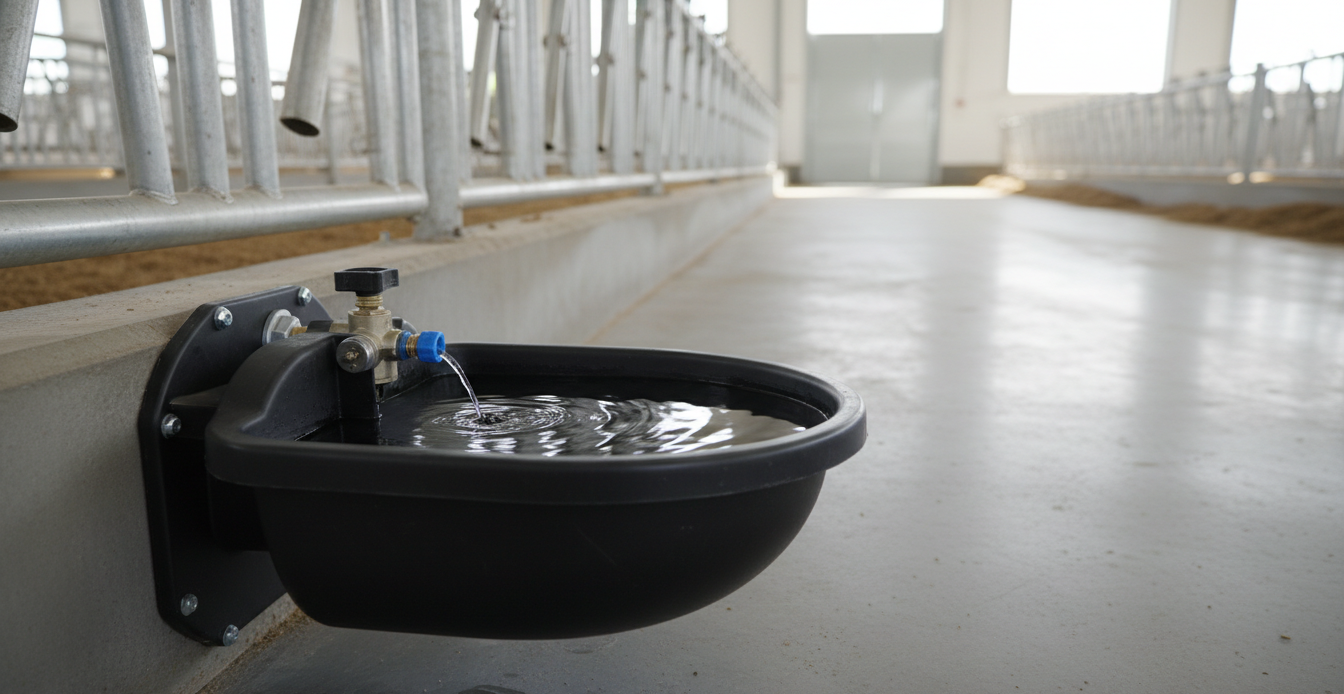
TL;DR: Automatic cattle drinking bowls need 20-80 PSI (1.4-5.5 bar) water pressure, optimally at 40-60 PSI (2.8-4.1 bar). We recommend a reinforced concrete pad (100mm thick with 600mm surround), 25mm minimum supply line for up to 4 stations, and frost-protected underground piping. In our experience, a lactating dairy cow drinks 76-114 liters daily. At our Ningbo factory, we test every automatic cattle drinking bowl under continuous 24-hour flow conditions before shipment.
Installing an automatic cattle drinking bowl correctly determines whether your livestock watering system delivers reliable service for 8-12 years or fails within the first two winters. At Sound Hardware, we’ve been manufacturing livestock watering equipment in Ningbo since 2012, and we’ve seen the installation mistakes that cost dairy farmers the most money—improper water pressure regulation, inadequate frost protection, and poorly prepared foundations.
We strongly recommend that before you install any automatic water bowl for cattle, you confirm that your water supply delivers 20-80 PSI at the bowl location. In our experience, if your pressure exceeds 80 PSI—common with some well pumps—we advise installing a pressure regulator before connecting the bowl. We’ve seen valves destroyed within months because a 120 PSI pump was connected directly to a bowl rated for 80 PSI maximum.
This guide covers everything we recommend for installing an automatic cattle drinking bowl correctly. Because we manufacture these bowls ourselves, we’re sharing the engineering specs and installation parameters we’ve developed through 14 years of field feedback from dairy farms across 30+ countries.
Understanding Water Pressure Requirements for Automatic Cattle Water Bowls
We consider water pressure the single most important installation step, because the float valve inside an automatic watering bowl is a precision mechanism calibrated to operate within a specific pressure window.
Our recommended operating range for all standard automatic livestock waterers is 20-80 PSI (1.4-5.5 bar), with what we’ve identified as the optimal sweet spot at 40-60 PSI (2.8-4.1 bar) for maximum valve life and consistent refill speed.
According to PeteCo Supply’s guide, most automatic waterer valves handle pressure up to 80 PSI. We agree with this assessment from our own testing—we’ve run our SDWB series bowls at 80 PSI continuous for 30-day test cycles without failure.
What Happens When Pressure Is Outside Our Recommended Range
We’ve observed that below 20 PSI (1.4 bar), the float valve may not seal completely, allowing water to trickle continuously. Our clients report that this creates muddy conditions around the bowl and prevents fast refilling—especially dangerous during summer when multiple cows return from milking simultaneously.
We’ve measured that a valve operating at 100 PSI wears out roughly 4x faster than one operating at 50 PSI. We believe increased pressure causes water hammer—a pressure spike we’ve seen crack plastic bowls and loosen pipe connections in our field testing.
We recommend a pressure regulator installed where the supply line enters the watering zone. We use brass-bodied regulators with built-in pressure gauges that cost approximately USD 25-60 and protect a watering system worth hundreds or thousands of dollars.
Our Step-by-Step Installation Process
Step 1: Site Selection and Ground Preparation
We recommend placing the livestock watering system on slightly elevated ground with natural drainage, at least 3-4 meters (10-12 feet) from feeding areas. We’ve found this minimizes feed dropping into the water and keeps our bowls cleaner between maintenance cycles.
We specify excavation to 150mm (6 inches) with a 100mm (4 inch) reinforced concrete pad extending at least 600mm (24 inches) beyond the bowl on all sides. We require steel mesh reinforcement in frost-prone regions—we’ve seen from client reports in Canada and Scandinavia that unreinforced concrete cracks within two freeze-thaw cycles in Northern climates.
Step 2: Water Supply Line Installation
We recommend calculating total flow requirement before running the water line. We reference data from Kirkton Veterinary Clinic and the University of Nebraska showing that a lactating dairy cow requires 76-114 liters (20-30 gallons) of water per day, which increases to 189-227 liters (50-60 gallons) during heat stress.
Our pipe sizing recommendations:
- We recommend 25mm (1 inch) HDPE or PVC supply line minimum for 1-4 drinking stations
- We specify 32mm (1.25 inch) mainline with 25mm branches for 5-8 stations
- We advise 50mm (2 inch) mainline for more than 8 stations or runs exceeding 100m
We recommend burying the supply line below the frost line. From our location in Ningbo, our winter ground only freezes to about 200mm, but we advise our clients in the US Midwest, Canada, and Northern Europe to bury at 0.8-1.2m (2.5-4 feet). We include insulated PE pipe for above-ground sections in our cold-climate specifications.
Step 3: Anchoring the Drinking Bowl
We recommend stainless steel expansion anchors (M10 or 3/8 inch minimum) through the bowl’s mounting flanges. Our specifications: tighten plastic bowls to 20 Nm and stainless steel bowls to 35 Nm. We warn our customers that overtightening plastic bowls can crack the mounting flange—we see this mistake in approximately 15% of installation photos customers send us.
The 5L drinking bowl models we manufacture feature reinforced mounting tabs with stainless steel inserts, designed to withstand the continuous 400-800 N of lateral force cattle generate when pushing against the bowl edge.
Step 4: Connecting the Water Line
Our automatic cattle drinking bowls typically use a 1/2 inch or 3/4 inch BSP female thread. We recommend PTFE tape on the fitting, tightened to a leak-free seal. We caution against overtightening plastic models.
We include a shut-off valve before the bowl connection in all our installation diagrams. We consider this the single most useful add-on at under USD 10.
Step 5: Float Valve Adjustment and Testing
We set the float arm so the water surface sits 50-80mm (2-3 inches) below the valve mechanism. We’ve found this depth prevents the valve from interfering with the cow’s muzzle. We recommend cycling the valve 3-5 times to confirm smooth operation.
We suggest observing the bowl for 24 hours after installation. Our target: no dripping, and refill within 10-15 seconds after a cow finishes drinking. We advise checking for flow restriction if refill time exceeds 20 seconds.
Winterization: What We Recommend as the Most Critical Step
Based on our client field reports, frost damage accounts for 60% of all service calls during winter months. We recommend three proven winterization methods:
- Our heated bowls: Built-in heating elements (80-150W) activate below 4°C (39°F). We offer optional heating kits for our SDWB series plastic bowls that consume about 45-65 kWh per month in near-freezing conditions.
- We recommend insulated underground supply: HDPE or PEX pipe buried below frost line, sleeved in foam pipe insulation at the connection point.
- We see circulation systems used mostly in barn environments where multiple bowls connect in series.
For installations where winter temperatures drop below -10°C (14°F), we strongly recommend our heated bowls with thermostatic control. We’ve calculated the energy cost of running a 100W heater for 4-5 cold months at roughly USD 25-35 per bowl per season—far less than replacing a frost-damaged bowl.
Water Quality: What We Recommend Based on Your Source
From our client feedback across different regions, we recommend the following based on your water source:
- For well water with hard mineral content: We recommend a sediment filter (50-micron minimum). We’ve found hard water deposits on the valve seat cause leakage within 6-12 months without filtration.
- For pond or stream water: We recommend a 20-micron pre-filter and stainless steel bowl construction for easier cleaning.
- For municipal water: We suggest a simple inline strainer at the bowl connection.
According to the K-State Research and Extension handbook, we agree that a well-designed watering system should incorporate a drain for maintenance and winter shutdown. We always include a drain valve at the lowest point of the supply line in our system designs.
Common Installation Mistakes We See Most Often
From 14 years of customer feedback, we’ve identified these as the most frequent installation errors:
- We see inadequate concrete pads—thinner than 80mm—that crack within two seasons, tilting the bowl and preventing proper float operation.
- We find farms without shut-off valves, forcing them to drain the entire system when a valve needs replacement every 3-5 years.
- We encounter undersized pipes—20mm pipe to 6 bowls creates a pressure drop of roughly 4 bar (58 PSI) across 100m, potentially dropping below minimum operating pressure.
- We warn about ignoring frost protection. In our experience, it’s not a question of “if” but “when” an unprotected pipe freezes.
- We caution against mixing incompatible materials—plastic bowl with copper pipe without a dielectric union causes galvanic corrosion.
Our Recommended Maintenance Schedule
We recommend the following maintenance schedule:
- We suggest weekly checks of water level and visual inspection for leaks and cracks.
- We recommend monthly cleaning of the bowl interior and float valve inspection.
- We advise quarterly valve mechanism inspection and pressure verification (20-80 PSI).
- We require annual pre-winter inspection of heating elements, pipe insulation, and frost covers.
As highlighted by The Cattle Site, automatic livestock waterers consist of an insulated base with a float-operated valve. We agree that regular maintenance ensures years of trouble-free operation.
Plastic vs Stainless Steel: What We Recommend
We manufacture both plastic and stainless steel automatic water bowls for cattle. Our recommendation depends on your conditions:
| Factor | Plastic (Our PP/PE Models) | Stainless Steel (Our SUS304) |
|---|---|---|
| Weight | 1.5-3 kg | 4-7 kg |
| Impact resistance | Good (absorbs impact) | Excellent (deforms rather than cracks) |
| Corrosion resistance | Excellent | Excellent (304 grade) |
| UV resistance | Needs UV-stabilized grade | Excellent (no UV degradation) |
| Heating element integration | Available (drop-in kit) | Integrated (better heat transfer) |
| Our typical service life | 6-10 years | 10-15 years |
| Cost (relative) | 1x | 2-3x |
| Best for | Indoor barns, moderate climates | Outdoor pasture, cold climates |
For outdoor year-round pasture conditions with freezing winters, we strongly recommend our SUS304 stainless steel bowls with integrated heating. We’ve calculated the upfront cost premium is offset by 10-15 years service life versus 6-10 for plastic.
Why Our Wholesale Buyers Trust Us
As a direct OEM manufacturer based in Ningbo, we’ve been producing livestock watering equipment for over 14 years. Our livestock watering system product line includes plastic drinking bowls from 5L to 13L capacity, stainless steel models, heating elements, and valve replacement kits. We test every bowl for 24 hours continuous flow before leaving our factory.
What distinguishes us from other suppliers:
- We provide full product traceability from raw material batch to final packaging
- We guarantee tested compatibility with North American, European, and Australian plumbing fittings
- We offer custom branding and packaging for wholesale distributors
- We support mixed container shipping combining watering equipment with AI products
- We supply technical documentation including installation manuals and pressure testing protocols
Contact us at kayla@sound-ai.com for your wholesale requirements. We can provide samples, specifications, and pricing for volume orders.
Post time: May-26-2026